Learning those 1 or 2 drills for every aspect of your game will help take you to the next level in golf.
Golf drills have been around for a long time, and having multiple drills in your arsenal is very important for improvement.
We have compiled a list of 22 of our favorite golf drills for all different parts of your game.
Learning these drills will help you perfect your strengths and iron out your weaknesses as you continue to grow in the game of golf.
Short Game Drills
Putting
1. Tee Gate
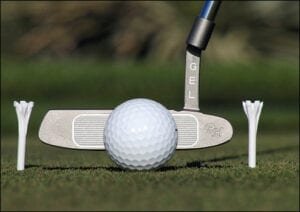
The “Tee Gate” drill is a very commonly used putting drill that helps you focus on your swing path and alignment. Too often, the entire focus of putting is the end result, but really the only thing a golfer can control is starting the ball on what the right line with the right speed.
With tee gate you place 2 tees inches in front of your golf ball in a way that creates a small “gate” for you ball to enter. Your goal is to knock the ball through that gate without touching the tees with either your ball or your club.
(Photo Courtesy of Golf Workout Program)
2. One-Handed Putting
One-handed putting is really as easy as it sounds. You simply work on striking putts with one hand so that you get used to the feel of the club head and so that each arm can work on keeping the club steady.
Here is a video of Tiger using both “Tee Gate” and one-handed putting together getting ready for an upcoming tournament:
3. Lag Putting
Lag putting is a very important concept to learn for long distance putting. It is a lot easier to aim for hole the size of a hula hoop than it is to aim for a hole the size of, well, a golf hole.
Lag putting is the idea of getting the ball close which is more about distance control than anything else. This drill will help you learn precise distance control uphill, downhill, and on flat surfaces.
Simply grab five golf balls and head to a flat spot on the green about 40 feet away from the fringe. Place a tee into the ground at the spot and drop the balls next to the tee. Turning to face the outskirts of the green, putt a ball towards the fringe of the green with a goal of getting the ball as close to the fringe as possible without going onto the second cut.
Try this from different places on the green and at different angles from the tee that you laid down so that you get a feel for the speed going flat, uphill, or downhill.
Chipping
4. Back Foot On Your Toe
This is a great chipping drill to get your weight forward and to make sure that your swing bottoms out just past the ball. Essentially, this drill teaches you the right position to have the club just drop right down onto the ball. All you do is get in your normal stance, move forward so that all of your weight is on your lead foot, and then pick your back foot up leaving just the tip of your toe on the ground.
5. One Armed
With your right arm, grip the club like you would if both hands were being used. Choke down on the grip and move your hand forward so that your grip is leading your club through contact. With this grip, and very little movement of the rest of your arm and wrist, make contact using the pivot of your upper body. Repeat that same drill with your left hand. This drill will help you learn to make good, shallow contact with the ball on short chip shots.
For a good visual example of this drill, watch this video:
6. Big Circle Drill
This drill is simply teaching you to get close enough to the hole on a chip shot so all you have to do is tap it in. It is a simple drill that you can do with a hula hoop or a string long enough to make a 5-6 foot circle around the hole.
Find different lies, angles, and even hazards and practice getting them inside the larger circle. Having a larger target to aim for gives you added confidence and you make a lot more inside the big circle than you do in the hole.
Pitching
7. Tee In Front
Place one tee directly in front of your ball about 1 inch ahead. Place a second tee even with the first and almost in line with the toe of your golf club.
The purpose of this drill is to teach you to bottom out your swing after striking the ball rather than before. Your goal is to try to hit the top of the first tee and create a divot right where the tee starts. You want the second tee to stay in place and not move so that you know you are coming in at the right angle of attack.
One of the things golfers struggle with the most is trying to help a pitch get up in the air rather than hitting down on the ball and letting the club do the work.
8. Swing Plane
This is a great drill to teach you the steeper swing plane that you want to have in a pitch compared to other shots. Place a swing plate directly behind the ball and put an alignment stick behind your club at about the same angle that the shaft of your club is making with the ground. Place it a couple of inches behind you sticking up from the ground.
The key to this drill is that you stay inside the alignment stick so that your swing plane is steep and then you strike the ball without striking the swing plate. This should have you hitting the ball straighter and with a better trajectory quickly.
Here is a video explaining and showing how this drill works:
9. One armed/Square Face
When pitching the ball you want your club face to be square at impact and at follow through. Swinging with both hands, you are going to focus on keeping the face square through contact and follow through. The key is to get your club face through the ball while your body is moving so that you can keep the club head square. Once you get the feel and sensation of a clean, square shot with one hand you should be able to translate than into you 2-handed pitch.
Watch this video for a great explanation and visual of this drill:
Full Swing Golf Drills
Setup
10. Arms Not Too Far, Not Too Close
This is a great “do anywhere” type drill, especially inside the comfort of your own home. Simple hold your club out where the club face is about eye level and your arms are out straight. Fold at the hips and bend at the knees until the club hits the ground and you are balancing with your hands on the club. This will show you exactly where your arms should hand at setup so that you do not start too close or too far from the ball.
Here is a video of this drill:
11. Check Your Weight
This is a very simple and telling drill of how balanced your setup is. You will need a buddy who is not afraid to give you a little shove to do this correctly.
All you do is get in your golf stance holding your club out like you are about to take a shot. As you are balancing in that position, have your buddy push you from behind and in front and see if you can keep your feet and body still.
See how hard you can be pushed without losing your balance and taking a step.
Takeaway
12. Practice the ¼ length Swing
Go from address to the point that your shaft is parallel to the ground. As do your takeaway from beginning to parallel, focus on these 4 things and make corrections when needed:
- You club is not inside of your hands.
- Your face is straight up in the air.
- Hands and club head are at the same height.
- Hands are in front of your thighs.
Start your swing at the same speed that you would start any other swing and stop it at different points to see if you are in the right position throughout your swing. Here is a good video to show you this drill and teach you more about the takeaway:
13. Nick Price Drill
This is an interesting drill in that there are a few different parts to it. This drill helps you keep your club on the correct swing plane in a very natural way with no additional aids.
It also keeps your shoulders from overturning. Start out with a normal address over the ball and then take your right hand off of the club while leaving the arm/hand in the same position. With your left arm, swing the club underneath your right arm until you get parallel with the ground. Replace your right hand onto the club and swing.
Here’s the same video from above jumping to this specific drill:
14. Motion Drill
This drill helps you bring athleticism back into your swing. Too often we stand over the ball and go from a static position into a golf swing.
When you hit a baseball, throw a football, or swing a hockey stick, you do very little from a static position. In athletics, you have to keep moving to maintain your athleticism and this drill helps you translate that idea into your golf game.
At the same time, this dynamic movement drill also forces you into many different “good” swing positions throughout the drill and especially with your takeaway. You actually start with your club in front of the ball, move it back quickly, stop your swing at the end of your takeaway, and then release back through the ball.
If you haven’t noticed yet, we really love this video!
Backswing
15. Wall Drill
In this drill, simply stand about a foot from the wall and perform your normal swing. The point of this drill is to not hit the wall. It is a simple concept, but you very well may hit the wall the first 1000 times you take your backswing because it is such a natural motion. This drill helps you to understand how steep your backswing should go and how to shallow it out to give you the inside-out motion that every golfer wants.
16. Start At Left Arm Parallel
Every golfer knows that one of the keys of your swing is to get to the “left arm parallel” position. It is widely believed that the majority of swing issues arise in the first part of your swing as you try to get to the left arm parallel position.
With this drill, you start off at that position and then finish your movement from there. Starting at that position allows you to get the rest of your body into the swing knowing that you hands and arms are starting off in the right place.
17. Get Left Hip Lower Than Right
Another very simple drill that does not require any extra equipment. This drill helps you to get your hips moving the right way which is how you incorporate a whole extra level of power and consistency. With this drill simply place a club on the top of both of your quads and begin to move your hips like you would during a swing. You can watch the shaft of the golf club to see the motion that your hips are taking. You want the butt of your club that is facing out to begin to move downward very quickly so that your left hip gets lower than your right.
Downswing
18. Weight Shift
This is a great drill to teach you when your weight begins to shift and how quickly it moves from left to right and back again. In this drill, you do 2 things that are both kind of counterintuitive in golf.
First of all, you grip the club close to the club face, almost on the hosel. Secondly, you take a baseball type step during your swing. Both of these 2 things help you begin to figure out how and when your weight shifts without every thinking about hitting the golf ball.
They key to this drill is to be able to transfer your weight in one direction when at the same time the pressure on your feet is going a different direction.
19. L to L
The “L” to “L” drill describes the shape that your arm makes at both the beginning and end of your swing. During this drill, you hit a few balls with just your right hand, a few with just your left hand, and a few with both hands on the club. The key is to find that “L” shape with both hands in your downswing and in your follow through. This is a very easy drill with a very simple motion that you can do anywhere and at any time that you have a club nearby.
This is a video showing and teaching the philosophy behind this drill:
20. Tipping The Shaft…The Steering Wheel Drill
This is a great drill to teach you what it means to “release the club” in your downswing. In this drill you can hold either a steering wheel or the head of a tennis racket and you perform a swing with your hands at about 9:00 and 3:00 on the wheel.
You learn to release your hands by turning the wheel like you are making a left hand turn and allowing your hands to just rotate along with the wheel.
The point is, you do not hit the ball with your hands, you hit the ball with your club. Your hands should release and allow all of the work you have done in the rest of your swing to come through at impact.
21. Split Grip Drill
Another good name for this drill would be the slap shot drill because you hold your golf club like a hockey player holds a hockey stick.
This drill helps you get your hands into the slot position and your bottom hand pushes the club slightly out so that you feel the inside-out motion of the swing. The club head naturally wants to go down, but putting your hand further down the shaft directs the club naturally down and out at the same time.
Basically this drill helps your bottom hand begin to help the club into the right spot every time.
Watch this video to learn more about how to do this drill and why it is effective:
Impact
22. Impact and Back
This drill helps you to learn what impact should look like by starting at the point of impact and working backwards.
Every golfer should know what their ideal impact position should look and feel like, and they should be able to get into that position without ever swinging. Starting at that position, you can then work back and see what positions your club should be in at different points during the swing.
Watch this video to see how this drill looks and to begin performing it:
Final Thought on Golf Drills
We tried to make this tutorial as video-heavy as possible so that you could see what each of the drills look like in real life.
You may not use every single one of these drills, but we know that out of these 22 golf drills at least a few of them will help your game if you are willing to use them.
Just having drills like these in your arsenal can make it easier to practice from anywhere and continue to improve your game.
Share in our comments your favorite drill on this list and how it improved your golf game. Take a video of you doing one of the drills to show other people what it looks like, and make sure you share this tutorial on social media.


